When working with resin, bubbles can be a frustrating problem that affects the final look of your project. Understanding how to effectively prevent and address these air pockets is essential for achieving a smooth finish. By focusing on your workspace setup, mixing techniques, and post-pour solutions, you can significantly reduce bubble formation. Let’s explore some practical tips that will help you get the flawless results you’re aiming for.
Understanding the Causes of Bubbles in Resin
When you mix resin, it’s crucial to understand what causes bubbles to form, especially since they can ruin your project. One primary culprit is the temperature of your resin. If it’s too cold, it can thicken, leading to trapped air.
Mixing too vigorously also introduces bubbles; instead, stir gently to minimize this risk. Additionally, moisture in your materials can create unwanted bubbles, so ensure everything is dry before you start.
If you’re using colored pigments or additives, they can also trap air, so be careful with how you incorporate them. Lastly, the mixing container can impact bubble formation; use a smooth, clean container to reduce the chances of bubbles forming during the process.
Preparing Your Workspace and Materials
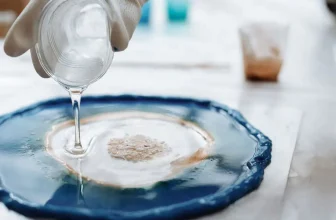
To ensure a successful resin project, start by preparing your workspace and materials carefully. Clear a flat, clean surface free from dust and debris. Make sure the area is well-ventilated to prevent fume buildup.
Gather all necessary tools, like mixing cups, stir sticks, and gloves, before you begin. Choose a dust-free environment to minimize contaminants that could introduce bubbles.
It’s also helpful to work at a stable temperature, ideally between 70°F and 75°F, as this affects resin consistency. If you’re using pigments or additives, have them ready and ensure they’re compatible with your resin.
Mixing Techniques to Minimize Air Incorporation
With your workspace and materials set up, the next step is to focus on how you mix your resin.
Start by using a slow, gentle stirring motion to minimize the introduction of air. Avoid whipping or vigorous mixing, as that can cause bubbles to form.
Use a clean, flat stir stick and scrape the sides and bottom of your mixing container thoroughly to ensure an even blend. If possible, consider using a vacuum chamber to remove any trapped air before pouring.
Another effective technique is to mix in smaller batches, as this allows for better control and reduces the risk of bubbles.
Post-Pour Solutions for Bubble Removal
Although you’ve taken great care during mixing, bubbles can still form after pouring your resin. If you notice bubbles on the surface, you can use a heat gun or a torch to gently heat the area.
Keep the tool moving to avoid overheating any spot, as this can damage your piece. Alternatively, you can lightly blow on the bubbles to help them pop.
Another effective method is to use a toothpick or a small pin to gently tease out stubborn bubbles. If you’re working with a large piece, consider using a vacuum chamber before pouring to eliminate bubbles before they even form.
Conclusion
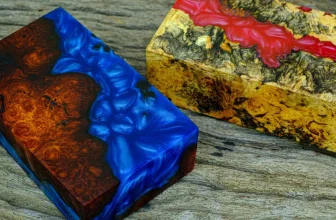
By following these tips, you can significantly reduce bubbles in your resin projects. Remember to prepare your workspace and materials carefully, and use gentle mixing techniques to keep air out of your resin. If bubbles do appear after pouring, don’t panic—tools like a heat gun or torch can help remove them. With practice and attention to detail, you’ll improve your technique and create beautiful, bubble-free pieces every time! Happy crafting!
Trending Products